Recently, I migrated my blog from Vercel to Cloudflare Pages, and I feel that the page loading speed has improved a bit. Coincidentally, Valaxy is still writing documentation on deploying with Cloudflare Pages, so I decided to write an article on this topic.
Prerequisites#
First, you need to prepare the following:
- A Cloudflare account;
- A GitHub account;
- A blog built using the Valaxy framework;
- A domain hosted on Cloudflare.
Creating a Pages Project#
Log in to the Cloudflare dashboard and find "Pages" in the left sidebar. Click on it to enter.
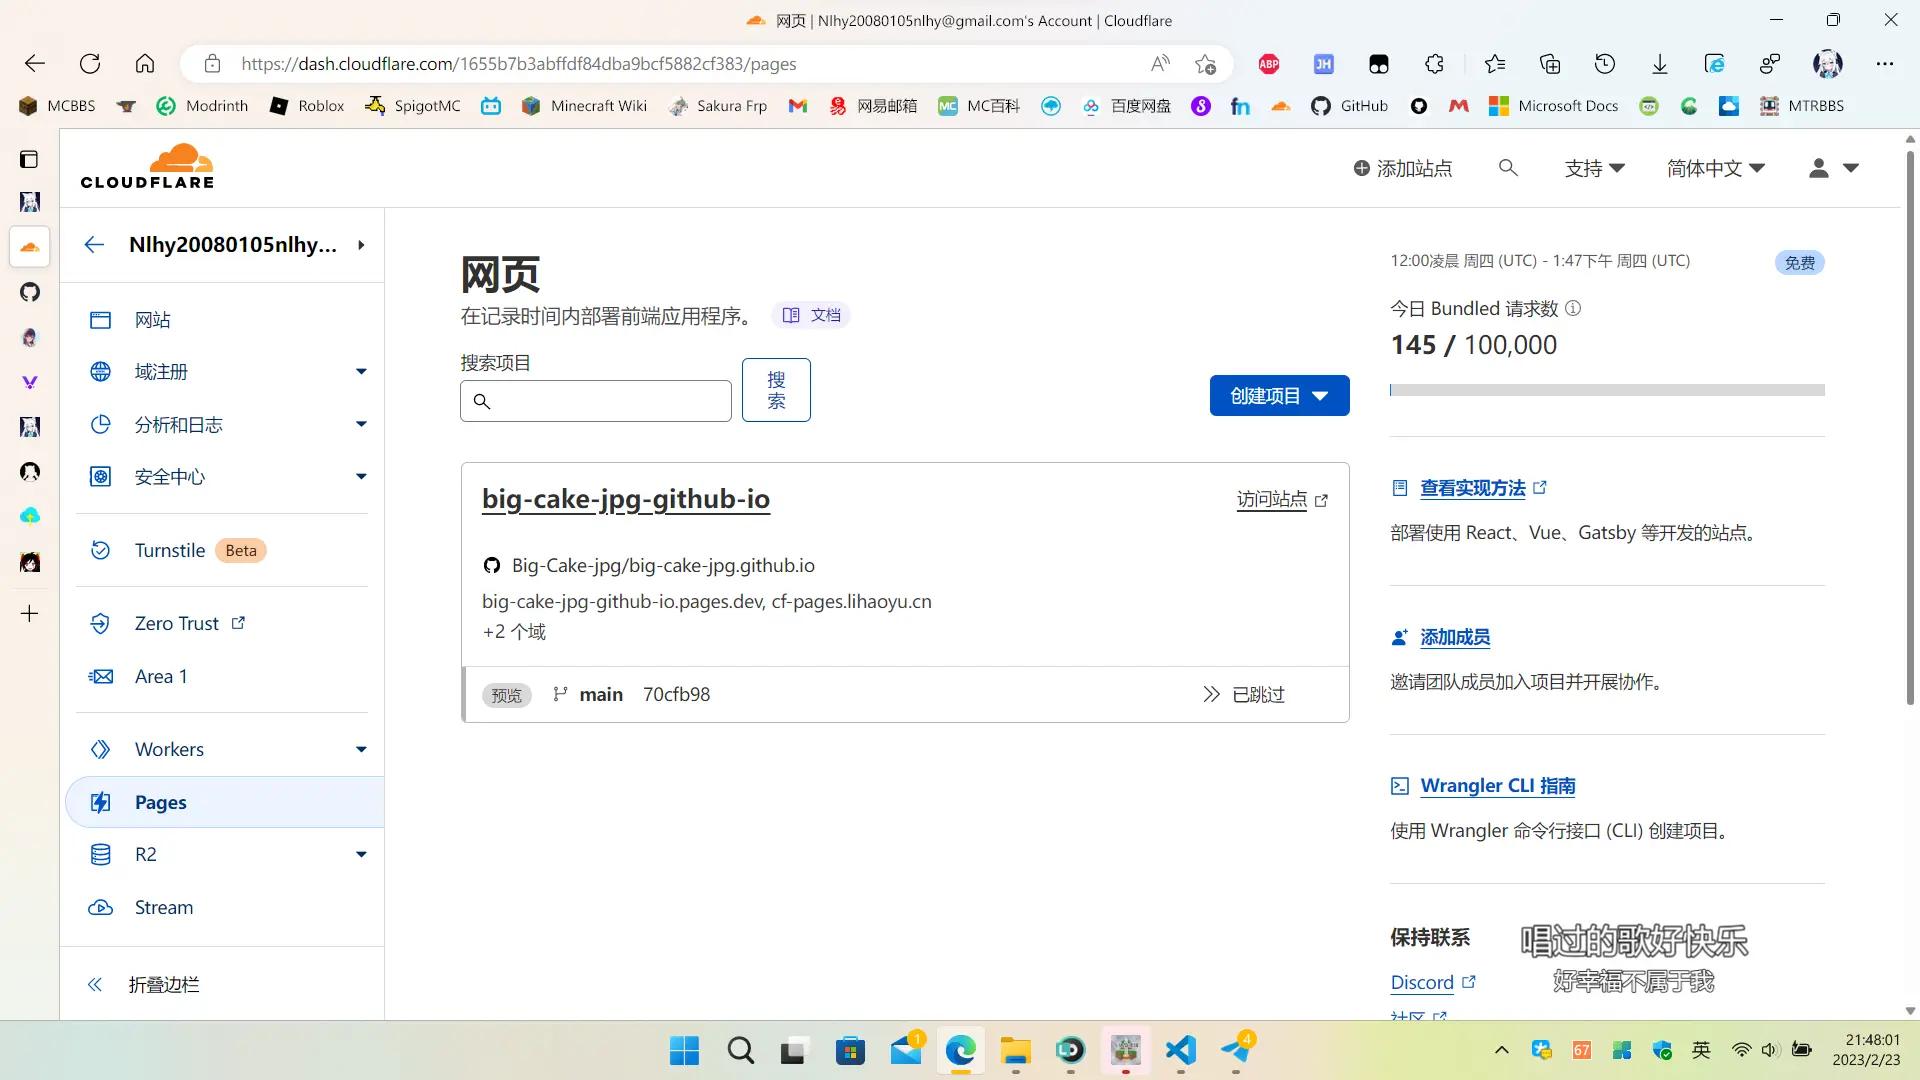
Click on "Create a Project" and then select "Connect to Git". Follow Cloudflare's instructions to add your GitHub account and install the GitHub App. Once the installation is complete, you can return to this page and select your repository.
For this demonstration, I'm using an independent repository created during my early Valaxy functional testing, with a version of extremely ancient Valaxy 0.12.3.

Click on the "Get Started" button, then set a project name you like, choose the branch to deploy, and configure the "Build Settings" as shown in the image below:

:::danger Note
The environment variables below also need to be configured, otherwise Valaxy's build will fail due to a Node.js version lower than v14!
:::
After configuring, click on the "Save and Deploy" button, and then wait for Cloudflare Pages to finish the deployment.
 Prompt after successful deployment
Adding a Custom Domain#
However, the pages.dev provided by Cloudflare Pages seems to be blocked, so we need to bind a custom domain.
Click on "Continue to Project", then click on "Set Custom Domain" on the page to add a custom domain.

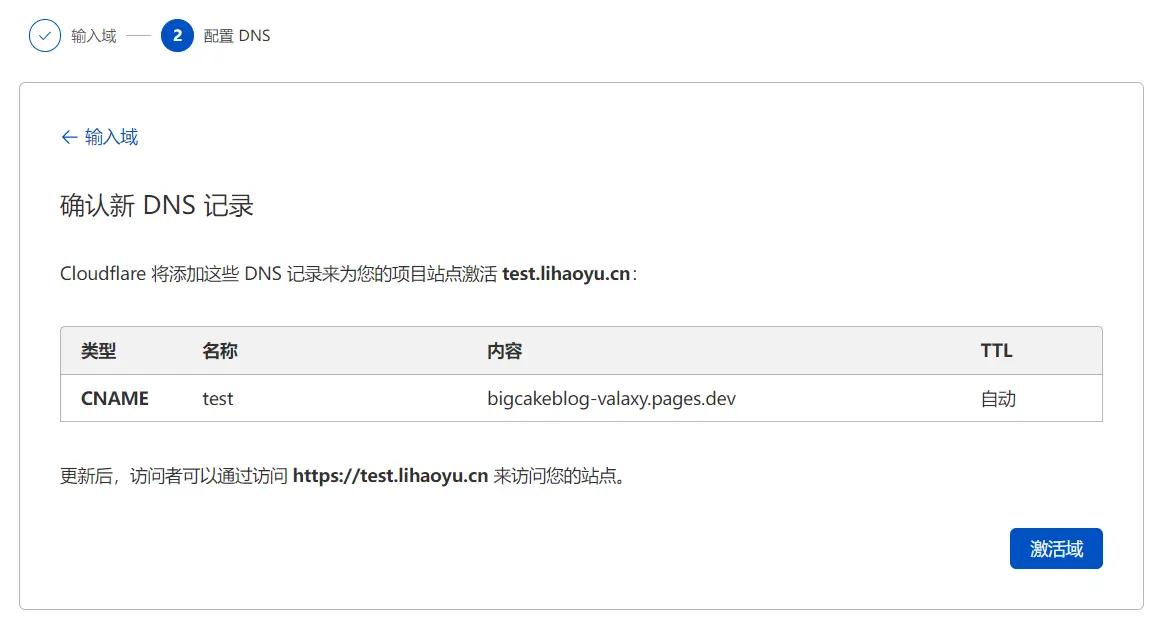
After waiting for a while, you can access your blog through this domain.
Congratulations! You're done!